Wednesday, 16 April 2014

Sorry blog has been a bit quiet

Have had a tough couple of weeks.

Mum found two lumps in her neck and daughter has had a brain scan. So have not been  able to keep on top of blogging, as well as looking after everything.

Anyway so am back now .

I have recently been making my own texture paste and mod podge, both of which worked out really well and I will share the recipes soon. I have also done the Sample for the class on the 21st


Very happy with it we will be making this card and a single slider card which I know will be a favorite as it always makes an impression. 


I need to get back home to my craft room to prepare samples for the 28th, and the 12th May workshops. I will post pics later this week.

This weeks weekly deals ( weekly deals run from Wednesday to Wednesday)
 Item Description Retail Price Sale Price
 130021 Crisp Cantaloupe 3/8” (1 cm) Stitched Satin Ribbon 10,95 €/£8.25 8,21 €/£6.19
 124005 Silver Glimmer Paper 5,95 €/£4.50 4,46 €/£3.38
 130814 This and That Epic Day Designer Series Paper 13,25 €/£9.95 9,94 €/£7.46
 131390 Afternoon Picnic Designer Series Paper 13,25 €/£9.95 9,94 €/£7.46
 130109 Polka Stampin’ Around Builder Wheel 5,50 €/£3.95 4,13 €/£2.96
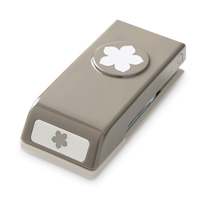
 118073 Fancy Flower Punch 20,95 €/£15.50 15,71 €/£11.63
 127211Floral District Photobook Template (digital download) 15,95 €/£12.50 9,57 €/£7.50

To buy an item click on the image below

Table built using Product Table Builder by The Crafty Owl - Independent Stampin' Up! Demonstrator.

Thats it or me for now
Byeeee

Wednesday, 9 April 2014

Faux driftwood wreath. Recycled brown paper wrapping

Hi all

Here is something I have been working on for a kit which I will be launching on the 20th May.  . It will be to make this wreath in your own choice of colours, and a variation of this wreath (my wreath was shaped round a hexagon , I just need to order in some items to make the second wreath.


Anyone who buys at least 3 kit items ( complete order totallying £40 ) and registers on the Faux driftwood wreath event page https://www.facebook.com/events/292593360904342/ will receive instructions to make wreath on the 20th May. I have put below full brights ink refils but you can use any ink refills you want.
Please do not throw away brown paper packaging from your Stampin Up Parcel as you will be needing it.

Table built using Product Table Builder by The Crafty Owl - Independent Stampin' Up! Demonstrator.


You will also need black ink pad, and some florists wire cost on ebay is less than £2.00 for enough to do a few wreaths ( I will add gauge next week as gauge I have is not quite right (ordered in a few other gauges to test)

If you haven't got a black ink pad already you have two choices. If you want to stamp flowers before spritzing you will need stazon if you want to stamp after spritzing has dried get the stampin up pad ofrif you want to do both get both.

These do not coubt as one off the three qualifying items but do count towards order total of £40.00


Table built using Product Table Builder by The Crafty Owl - Independent Stampin' Up! Demonstrator.


I will add other wreath in about 9 days


Bye for now Tracey

Monday, 7 April 2014

Great day at the craft club and Family Craft day 14th April The Crown Hotel Tarporley Cheshire

We had a great day at the Craft Club Tarporley, but the concensus was that nobody wanted to stqrt classes before the end of the easter holidays, but there was interest in something to do with the Children over Easter,

So because my customers want something to do over Easter with the Children

14th April the Crown Hotel, Etc Restaurant Tarporley CW6 0AT

Easter Family Craft day

Join us at The Crown Hotel £5.00 per child includes lunch of 12 inch pizza  to share with your child


Morning session 10.30 till 1.30 (inc lunch)
Afternoon session 12.30 till 3.30 (inc lunch)
lunch 12.30 till 1.30

£5.00 per child includes lunch 12 inch pizza to share with your child, 2 children 2 pizzas etc, Max 3 children per accompanying adult

Make one of these cute little boxes filled with chocolate eggs and a matching card.

Suitable for children 4 and over. Please bring 1 pair of small scissors per child over 6, children under 6, 1 pair of scissors, adult will use scissors.

Limited places book early to avoid disappointment please ring 01270 215625 or 07963 459737

Why not book with a friend.

Please share this , as , as a parent I know how difficult it is to find great things to do with your children during the holidays.

Thursday, 3 April 2014

Busy day preparing for the Craft Club Tarporley launch

Well launch day is rapidly approaching 7th April 10.30 and I have been busy making samples, to show the kind of things we will be doing at the club.

We will be altering some items. So I put together this wall plaque it looks much better in real life as all the flowers are 2d and the pearl centres are alternate colours. The plaque itself was a wooden  Mothers day heart from Poundland (check out your nearest one there maybe some left)


I covered it with Chevron paper from the Essentials Designer series paper download .

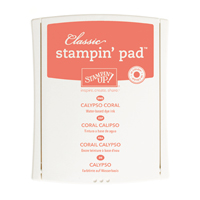
 I used a dauber to daub Calypso Coral then Basic Black ink round he edges.

The flowers round the edge were punched with the Petite petals punch, from the flower paper in the Sun Garden download . I used an embossing tool to shape each flower adhered it to the plaque then added alternate pale peach and pale green pearls for the centres (these were free with something and went so well that I had to use them)

I also printed off a sheet of Poppy parade from MDS installed basic cardstock.
Cut out the Live , Love from Poppy Parade and Laugh from Calypso Coral with my Silhouette and adhered as shown.

 Then cut a strip of Calypso Coral  the same width as the diagonal stripe stamp in the Gorgeous Grunge stamp set with black Stamp and write marker I wrote Every Moment on one and Beyond words on the other. Stamped the end with the diagonal stripes and black ink then cut leaving 6 stripes on the Every moment one and only 2 stripes on bottom one. Then daubed the edges with black and adhered.

Then cut same size strip from Poppy Parade wrote Every day then Stamped with diagonal stripes and cut to 5 stripes.

Ribbon was 1/2 inch silver white organza and 1/4 inch orange organza from vast collection of ribbons.

Links to all items used

Table built using Product Table Builder by The Crafty Owl - Independent Stampin' Up! Demonstrator.


Talking of the Petite petals punch I was experimenting today to see if you could make dinky roses with it. I wanted a specific look which I used to get with printed cardstock, the paper splits and I quite like the way the edges look.  Anyway, here is my little card.


I punched 3 petite petals in Cameo Coral (digital printed from MDS cardstock) and one in old olive. I cut out 2 petals from one of the Cameo Coral punches and used tweezers to grab the remaining piece by one edge whilst I rolled  it round itself then used Tombow to adhere it and set it to one side.

I then cut out One petal from Coral and using a large ball embossing tool and an embossing foam pad. I rubbed hard over the cardstock to loosen all the fibres, then pulled both edges till one petal on each side overlapped and adhered.

I then used the large ball tool to loosen all the fibres of the remaining Coral punch out. Then placed tool in the centre and rolled round till shape pulled into middle. Turned over and did it again.

I then used snips , to snip off a small piece of the bottom of the 1st piece and adhered this into the centre of the second piece, Then snipped of a bit of the base of the second piece, then adhered this to the centre of last one.

I then took the old olive punch out and using a small ball embossing tool dragged from the centre to the tip of each leaf to make veins then added diagonal veins.

Then adhered rose to leaves. I think they look cute.

Links to all additional items used.

Table built using Product Table Builder by The Crafty Owl - Independent Stampin' Up! Demonstrator.

and finally

I love this new download from Stampin' Up! its called Fine Print and it made me do a double take, and then when I realised what it said I had a little chuckle. But I couldn't resist having a play.


The card bases were made with the same download as the plaque. The die cuts were scalloped circle, circle, Curly lable punches in MDS which I cut out with my Silhouette.

Table built using Product Table Builder by The Crafty Owl - Independent Stampin' Up! Demonstrator.


More to come tommorow, but now I am off to bed , as I have another busy day planned. Hopefully I will get time to share the craft journal I put together  and the other set of cards I made today as well as some of he items I make tommorow.