We will be altering some items. So I put together this wall plaque it looks much better in real life as all the flowers are 2d and the pearl centres are alternate colours. The plaque itself was a wooden Mothers day heart from Poundland (check out your nearest one there maybe some left)
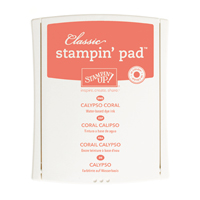
I used a dauber to daub Calypso Coral then Basic Black ink round he edges.
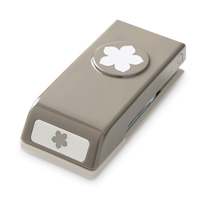
The flowers round the edge were punched with the Petite petals punch, from the flower paper in the Sun Garden download . I used an embossing tool to shape each flower adhered it to the plaque then added alternate pale peach and pale green pearls for the centres (these were free with something and went so well that I had to use them)
I also printed off a sheet of Poppy parade from MDS installed basic cardstock.
Cut out the Live , Love from Poppy Parade and Laugh from Calypso Coral with my Silhouette and adhered as shown.
Then cut a strip of Calypso Coral the same width as the diagonal stripe stamp in the Gorgeous Grunge stamp set with black Stamp and write marker I wrote Every Moment on one and Beyond words on the other. Stamped the end with the diagonal stripes and black ink then cut leaving 6 stripes on the Every moment one and only 2 stripes on bottom one. Then daubed the edges with black and adhered.
Then cut same size strip from Poppy Parade wrote Every day then Stamped with diagonal stripes and cut to 5 stripes.
Ribbon was 1/2 inch silver white organza and 1/4 inch orange organza from vast collection of ribbons.
Links to all items used
Table built using Product Table Builder by The Crafty Owl - Independent Stampin' Up! Demonstrator.
Talking of the Petite petals punch I was experimenting today to see if you could make dinky roses with it. I wanted a specific look which I used to get with printed cardstock, the paper splits and I quite like the way the edges look. Anyway, here is my little card.
I punched 3 petite petals in Cameo Coral (digital printed from MDS cardstock) and one in old olive. I cut out 2 petals from one of the Cameo Coral punches and used tweezers to grab the remaining piece by one edge whilst I rolled it round itself then used Tombow to adhere it and set it to one side.
I then cut out One petal from Coral and using a large ball embossing tool and an embossing foam pad. I rubbed hard over the cardstock to loosen all the fibres, then pulled both edges till one petal on each side overlapped and adhered.
I then used the large ball tool to loosen all the fibres of the remaining Coral punch out. Then placed tool in the centre and rolled round till shape pulled into middle. Turned over and did it again.
I then used snips , to snip off a small piece of the bottom of the 1st piece and adhered this into the centre of the second piece, Then snipped of a bit of the base of the second piece, then adhered this to the centre of last one.
I then took the old olive punch out and using a small ball embossing tool dragged from the centre to the tip of each leaf to make veins then added diagonal veins.
Then adhered rose to leaves. I think they look cute.
Links to all additional items used.
Table built using Product Table Builder by The Crafty Owl - Independent Stampin' Up! Demonstrator.
and finally
I love this new download from Stampin' Up! its called Fine Print and it made me do a double take, and then when I realised what it said I had a little chuckle. But I couldn't resist having a play.
The card bases were made with the same download as the plaque. The die cuts were scalloped circle, circle, Curly lable punches in MDS which I cut out with my Silhouette.
Table built using Product Table Builder by The Crafty Owl - Independent Stampin' Up! Demonstrator.
More to come tommorow, but now I am off to bed , as I have another busy day planned. Hopefully I will get time to share the craft journal I put together and the other set of cards I made today as well as some of he items I make tommorow.








No comments:
Post a Comment