

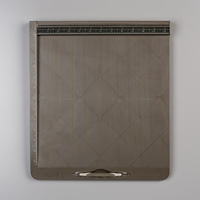
Now before last night I was already in love with it. I love the envelopes bows and boxes you can make with it. But last night it became my favorite purchase ever. I have always been disappointed with corner punches. What is the point of only rounding 2 corners on a card. As corner punches could only ever punch through one layer of card.
Last night I was making the above project using Spring Fever kit Digital download To buy please click image below which will take you to the item in my shop.
 |
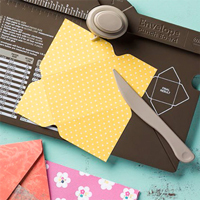
Ta da along comes the Envelope Punch board and all my corners are now rounded. Not just any card corners but card corners made with 250gsm card. Unbelievable, now rounded corner cards are going to be appearing everywhere!
Anyway here is a close up of the project.

I had these little balbearing games left over from my grandsons birthday party last year. As we were doing some spring cleaning I came across them. I am going to use the round ones on large cards as central feture, and try to make little triangular cards with the triangles. As soon as I saw them I thought. Ohh you could make a cute little card with these if you could get the backs off. You can by them on Ebay.
So a little while later after a few failures I found the best way to do it.
You need one of those tiny spectacle screwdrivers.
Place it in the edge of the ballbearing game and wiggle wiggle wiggle (didn't somebody write a song?) Anyway I did this all the way round. ( Know you now have images of me holding the ballbearing gameand the screwdriver doing the Wiggle,Wiggle,Wiggle, I apologize not a great image!
Then I gently raised each centre, then slid the tip of screwdriver slowly across to each corner. You may get little nibbles in the plastic but as its going to be glued and covered so don't worry, even a crack in the back isn't going to effect the end result.
I then measured the ballbearing game's card insert.
I set up a custom page in My Digital Studio 5.5 cm square. (but you can use your own usual image editing softwear)
Everything above is from The standard cardstock installed on MDS and the Spring Fever kit except the green embellishment behind the pink embellishment with the hello in the far left card, unfortunatly I can't remember which kit that's out of as soon as I do I'll put the details in.

I then designed the panel Using Melon Mambo MDS Cardstock as the backgound,
 |
| Envelope Punch Board |
Place the Spring Fever -Bunny 1 in the centre. Enlarge the daisy and place to the left. Then I took another daisy cropped so I only had the leaves and stem. Then added Spring Fever , embellishment Flower 10 and 11. Those are the polka dot heads. I cropped one of the stems shorter , and mirrored the stem on one and angled the head on the other. I then selected everything and added a shadow . Then finished with the Spring Fever- Dream Big stamp. Thats one thing I love about digital, no matter what size your project the stamp fits.
I put the panels back in the ball bearing game. Then glued with a few dabs of superglue.
To make the card back I used a piece of 250gm cardstock (because the ballbearing games are a bit heavy) and trimmed to 6cm by 12 cm scored at 6cm and then folded. Punched ALL 4 CORNERS (Yippe!!!) with the Envelope Punch Board. Adhered to back of game with Hi-tack glue.
To buy please click the image of the required item below which will take you to the item in my shop.
 |  |  |  |  |
 |
Table built using Product Table Builder by The Crafty Owl - Independent Stampin' Up! Demonstrator.
Then I cut a 129mm by 129mm peice of the printed double-sided cardstock and with the Envelope Punch Board, punched and scored at 59 and 70 on all sides, to make the boxelope.
Fold on all the score lines. Then put tape on the bottom edges of the side flaps and positioned the side and borrom flaps, to make the box envelope, then used the corner rounder on the top of the evelope flap.
I cut a strip of the striped paper 3 cm wide by 14cm long. Folded it in half and punched one cm each way from the center top and bottom to create the band and closure around the middle .
I had some wooden buttons so I coloured the center of the button with the Melon Mambo marker. Looks less blotchy in real life. Attached the button with hi tack glue to the band then attached the band at the back with tape.
So I hope you like my mini card with a big difference
Rattytatty


