Showing posts with label Craft Classes Cheshire. Show all posts

Thursday, 20 November 2014

Quick tip and Project Life Hello December digital download

Well I am sorry that I have not been keeping up with posting I will try harder/

1st you may have seen or heard of Chameleon pens. That change tone from pale to dark in one pen. Well you can do exactly the same with both your Stamp and Write ,markers and your Blendabilities pens.

So
Take a Stamp and Write marker and your stamp and write blender pen
or
The darkest or medium shade of any of the blendabilities sets and the blendability colour lifter pen

Remove the lids from both

Hold the coloured pen straight up with the tip up. Position the blender pen or colour lifter pen tip down onto the coloured pen tip count to 5. Start colouring with your pen. You will notice that the colour changes fro almost no colour to full colour strength. If you want a shorter colour change count to 3 or longer count to 7 etc.


The above was coloured with Darkest Cherry Cobbler and darkest Pumpkin Pie Blendabilities with the above technique.

This week I have also been catching up on Scrapping some of my old pics and I just had to use the Stampin' Up! project life Hello December Download.


I also used the Basic Rhinestones from The Basic Rhinestone and pearls download.

So thats it for today

Hopefully catch up with posting soon


Friday, 26 September 2014

1st Craft classes in Northwich

So excited have finalised venue and date for the 1st craft class in Northwich;

So on the 22nd October 2014 I will be happily teaching the 1st fifteen people to book the class and as its the run uo to Christmas Octobers class is going to be Christas themed and we will be making


the above two cards and two boxes.

Classes will cost £20 but you will be receiving £15 worth of great products in your craft kits.

For more information please check out my Craft kits and classes page

Classes will be on the 4th Wednesday of the month,


Theme for the next class 26th November

Handcrafted gifts,

Wednesday, 10 September 2014

Last week at Stamp and Scrap

It was a very busy week,

Had a Polymorph plastic button making and pendant making demo. On  Wednesday and  Thursday


Here are some of the samples from the demo. I will be offering a Polymorph Plastics class by mail and a class in Cheshire. Prices and dates to be arranged, If you would like to find out more please sign up for my newsletter on the Contact form on my Stampin' Up! site 

The leaves on the 1st pendant are from Kinda Eclectic Stamp set, The flowers are from Petite petals stamp set and the butterflies are from Papillion Pot pourie. (If you like me still have loads of unused peel offs , you can also use them (at last something to use some of them for)


Then I had a make and take for the lovely ladies at the Northwich U3A craft group, We made this cute little cracker box and tag.

For the cracker

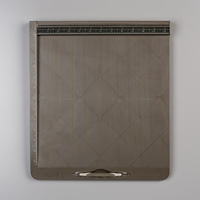
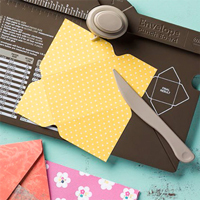
Envelope Punch Board 133774
All Is Calm Specialty Designer Series Paper 135823
Artisan Label Punch 130920
Label Love clear mount stamp set 130622
Lost Lagoon 3/8" Silky Taffeta Ribbon 135841

For both

Pear Pizzazz Classic Stampin' Pad 131180
Lost Lagoon Classic Stampin' Pad 133644
Whisper White A4 Card Stock 106549

For tag

Tree Punch 135859
Lost Lagoon A4 Cardstock 133686
Project Life Holiday Cheer Photopolymer Stamp Set 135188
Basic Rhinestones Jewel Accents 119246
White Baker's Twine 124262


Then had my grandson for 3 days,  So fairly worn out


Wednesday, 9 July 2014

Contemporary 4 by 4 Card and envelope tutorial. Featuring some products from new castalogue

I am planning to offer at least 2 tutorials a month . So here is the 1st


4 inch square Contemporary grunge card and envelope

Supplies list

Both versions

Whisper white cardstock 6 ¾ inch square and  3 3/4 inch square and 2 ½ inch square
Envelope punch board
Work of Art stamp set
Georgeous Grunge Stamp set
Feel Goods Stamp Set
Stampin’  Sponges
Snail adhesive Sticky Strip and Dimensionals adhesive pads
Basics Rhinestones
Stampin’ Trimmer
Stamp a ma Jig

Blue version                                                                                  Orange  Version
Island Indigo Ink pad                                                                       Tangelo Twist Ink pad
Marina Mist Ink pad                                                                         Calypso Coral Ink pad 
 (to purchase click on item image below tutorial)

Envelope
1 Take the 6 ¾ square of whisper white , Using the envelope punch board Punch and score at 3 3/8 inches, rotate and line up on score and punch and score, do this  on all sides.

2  Fold into the center and burnish folds with bone folder. Ink edges  with either Marina Mist or Calypso Coral

 3 Using the small ink splashes from Georgous grungestamp set.  Stamp in Island  Indigo  or Tangelo Twist On the front Stamp across each corner leaving a clear space in middle. Then stamp over back of envelope.

4 Take the heart stamp from Work of Art Stamp set  and stamp in Island Indigo or Tangelo Twist   3 on right side of card one over hanging edge. One on left near the bottom. Stamp 3 on back one over the point of flap and one higher up on each side of flap.

Place sticky strip on the inside of flap to either edge. Leave cover on until ready to use.


Card
1 Take the 8 by 4 inch piece of whisper white and score with trimmer at 4 inches. . Then ink round edges with Marina Mist or Calypso coral,  Then using the zigzag lines from Work of art. Using just about ¼ inch stamp in Tangelo Twist around all the edges of the card front.

2 Take the 3 ¾ inch piece of whisper white, and ink round edges with Marina mist or Calypso coral. Then Stamp all over with the small splatter stamp in Tangelo Twist or Island Indigo. Adhere to center of card with snail adhesive.

3 Take the 2 ½ inch piece of whisper white and round corners using the envelope punch board. Ink edges with Marina Mist  or Calypso Coral inkpads

4 Using the Stamp a ma jig/ Stamp your chosen feel goods Stamp onto imaging sheet and position   at an angle over the 2 ½ inch/square angle going up from left to right. Then using  Stamp a ma jig stamp Greeting in place. In Tangelo twist or Island Indigo

5 Take the heart stamp from the Work of Art set and using Stamp a ma jig . Position heart at a complementary angle to greeting at bottom right corner of 2 /2 inch square. Add small rhinestone to top right of heart

6 Adhere 2 ½ inch square with 4 dimentionals One in each corner to center of card.

Hope you like this tutorial

To find out about upcoming classes, Classes at home for Housebound disabled infirm and carers, Hosting a Stampin’ Up! Party, becoming a Stampin’ Up! Demonstrator  or to order


Call me Tracey Allen on 01270 215625 Stamp and Scrap (Cheshire)  or visit my shop at www.stampandscraptips.stampinup.net

Playing with A Work of Art Stamp set

Today I have been playing with the "Work Of Art" Stamp set which I love. 


These Ship cards I thought would make a great card for a Man who is going through troubled times. I thought two of the stamps in the "Work Of Art" set coud be used for waves, the arty circle for a sun and one of the brush stokes makes a great cloud. I also used the new "Traveller" stamp set for the Ship which I think is going to be my goto Mens stamp set and one I can see myself using a lot in altered art projects and The You've got courage stamp is from |the "Something to Say" stamp set and I thought it went very well with the deco feel of these cards. Colours used Island Indigo ink, Lost Lagoon cardstock and Hello Honey Ink pad and Tangelo Twist (used to blend into the greeting plaque edges)


The 3 inch square canvas I stamped with the "Work Of Art" stamp set and Blackberry bliss and Tangelo twist And Basic Black ink pads , The greeting was punched with Artisan Label punch. The lovely little flowers were punched with the Itty Bitty Accents punch pack flower punch ( which co-ordinates with "Something to Say" stamp set and Pictogram Punches Stamp set as well) I know they will both be heavily used in the near future. I coloured Medium Pearls with Blendabilities darkest Daffodil Delight, Pumpkin Pie and Rich Razzleberry pens.


I have also been playing with the shaving foam technique and decided to use some of the pieces for these little note pads using the Work Of Art Stamp set . The marbled one is obvious, but after making two pieces of marbled cardstock  I smoothed out the foam without reinking and made a sheet with that and got these horizontal patterns. Used Tangelo Twist cardstock and Lost lagoon ink on whisper white for the little itty bitty Accents punch pack flowers. Coloured rhinestoes with blendabilities

So thats what I've been up to if you want to buy any off the items mentioned you can find them at my shop
www.stampandscraptips.stampinup.net or you can ring me to order on 01270 215625

Tuesday, 25 March 2014

2 and 1/2 weeks as an Independent Stampin' Up! Demonstrator or why you will want the Envelope Punch Board

I have loved my 1st 2 weeks as an independent Stampin' Up! demonstrator. Its fantastic working with such amazing products and my favorite one of all is the envelope punch board.

Now before last night I was already in love with it. I love the envelopes  bows and boxes you can make with it. But last night it became my favorite purchase ever. I have always been disappointed with corner punches. What is the point of only rounding 2 corners on a card. As corner punches could only ever punch through one layer of card.

Last night I was making the above project using Spring Fever kit Digital download To buy please click image below which will take you to the item in my shop.
Table built using Product Table Builder by The Crafty Owl - Independent Stampin' Up! Demonstrator.


When I started to round the corners of my tiny 6cm wide card. I started to punch the corners  of the 250gsm card individually as that's always what I had always had to do. Then I got to the fold and thought £darn I'll have to trace round the balbearing game then trim them off  "I wonder" , I placed the 250gsm folded corner in the corner punch and pow down it went, straight through , No problem"!

 Ta da along comes the Envelope Punch board and all my corners are now rounded. Not just any card corners but card corners made with 250gsm card. Unbelievable, now rounded corner cards are going to be appearing everywhere!

Anyway here is a close up of the project.


I had these little balbearing games left over from my grandsons birthday party last year. As we were doing some spring cleaning I came across them. I am going to use the round  ones on large cards as central feture, and try to make little triangular cards with the triangles. As soon as I saw them I thought. Ohh you could make a cute little card with these if you could get the backs off. You can by them on  Ebay.

So a little while later after a few failures I found the best way to do it.

You need one of those tiny spectacle screwdrivers.
Place it in the edge of the ballbearing game and wiggle wiggle wiggle (didn't somebody write a song?) Anyway I did this all the way round. ( Know you now have images of me holding the ballbearing gameand the screwdriver doing the Wiggle,Wiggle,Wiggle, I apologize not a great image!
Then I gently raised each centre, then slid the tip of screwdriver slowly across to each corner. You may get little nibbles in the plastic but as its going to be glued and covered so don't worry, even a crack in the back isn't going to effect the end result.

I then measured the ballbearing game's card insert.

 I set up a custom page in My Digital Studio 5.5 cm square. (but you can use your own usual image  editing softwear)
 Everything above is from The standard cardstock installed on MDS and the Spring Fever kit except the green embellishment behind the pink embellishment with the hello in the far left card,  unfortunatly I can't remember which kit that's out of as soon as I do I'll put the details in.


  I then designed the panel  Using Melon Mambo MDS Cardstock as the backgound,
Envelope Punch Board
I took the Spring Fever -Bunny 1 embellishment from the Spring fever kit and cropped it to just the Bunny and then did the same but cropped to the Daisy. Leaving me with 2 embellishments .

Place the Spring Fever -Bunny 1 in the centre. Enlarge the daisy and place to the left.  Then I took another daisy cropped so I only had the leaves and stem. Then added Spring Fever , embellishment Flower 10 and 11. Those are the polka dot heads. I cropped one of the stems shorter , and mirrored the stem on one and angled the head on the other. I then selected everything and added a shadow . Then  finished with the Spring Fever- Dream Big stamp. Thats one thing I love about digital, no matter what size your project the stamp fits.


I put the panels back in the ball bearing game. Then glued with a few dabs of superglue.


To make the card back I used a  piece of 250gm cardstock (because the ballbearing games are a bit heavy) and trimmed to  6cm by 12 cm scored at 6cm and then folded. Punched ALL 4 CORNERS (Yippe!!!) with the Envelope Punch Board. Adhered to back of game with Hi-tack glue.

To buy please click the image of the required item below which will take you to the item in my shop.
Table built using Product Table Builder by The Crafty Owl - Independent Stampin' Up! Demonstrator.

I printed both sides of an A4 sheet of Whisper White cardstock. One with the striped paper from the Spring Fever kit and then printed the reverse with Melon Mambo digital cardstock (from the cardstock basics installed on MDS).

Then I cut a 129mm by 129mm  peice of the printed double-sided cardstock and with the Envelope Punch Board,  punched and scored at 59 and 70 on all sides, to make the boxelope.

Fold on all the score lines.  Then put tape on the bottom edges of the side flaps and positioned the side and borrom flaps, to make the box envelope, then used the corner rounder on the top of the evelope flap.

I cut a strip of the striped paper 3 cm wide by 14cm long. Folded it in half and punched one cm each way from the center top and bottom to create the band and closure around the middle .

I had some wooden buttons so I  coloured the center of the button with the Melon Mambo marker. Looks  less blotchy in real life. Attached the button with hi tack glue to the band then attached the band at the back with tape.

So I hope you like my mini card with a big difference

Rattytatty

Sunday, 23 March 2014

When I saw this photo I just had to scrap it

Stamp and Scrap - Cheshire  Craft Clubs -Cheshire Craft Club-Tarporley www.stampandscraptipsandtechniques.blogspot Craft kits by post

Its a stunningly funny and adorable photo. I knew just what I wanted to do with it. Anyway I used MDS to recolor papers and used the ink splatters  which come with MDS ( in my opinion MDS is worth buying for the stamp colouring tool and the Stampin up punches and kits already installed, but what Im not sure you know is that you can use Stampin' Up downloads in any editing softwear. Yep can you believe it access to all those wonderful Stampin' Up! goodies even if you are used to using the much more complex Photoshop, Photoshop elements and other editing programs like Serif Craft Artist. ) I then exported everything into my usual editing softwear and did the rest,

Venetian Romance Designer Series Paper -- Digital Download

I used Venetian Romance papers. I have used these for loads of things everytime I look at them I think of new ideas. Autumn elements stamp and brush set and the ink splatters installed in MDS.

The reason  I bought My Digital Studio even though I am used to advanced programs like Photoshop was because it came with loads of the Stampin' Up goodies installed. You don't have to buy MDS to buy all the new downloads as they come in jpg format. But some of the punches don't. So having MDS means you can use those too I just export as jpg and use in my other programs.

What I used to create the layout

Table built using Product Table Builder by The Crafty Owl - Independent Stampin' Up! Demonstrator.

Because I am very new at Stampin' Up! a lot of my money is going on building my business which means I am not able to buy all the kits I want,

So tommorow  I will post a list of my 10 ten most wanted kits and let anyone who wants too vote on which is their favorite and the 3 kits with the most votes will be what I buy next. Careful voting people.