Friday, 22 August 2014

Play with Plastics class preview

Well all, hope you are all well. I have been preparing samples for my Play with plastics class, which I will be offering as a class in the near future. 


You will get to play with 2 forms of plastic. On their own and combined . You will take home 2 complete pendants and 3 embellishments and 2 buttons. Plus £20 worth of product. Class will cost £30.
I will be looking for a venue and date, but it will be in Northwich,
Tarporley or Crewe, in Cheshire in the UK (not America or Australia)

It will be all day class. If its held in Tarporley. Class cost will be £35 but will include a cooked lunch of pizza or pasta and venue has rooms available, If in Crewe or Nantwich you will have to bring your own lunch,

If you are interested in this class please e mail stampandscrap@mail.com with plastics class in the subject, and then I can e mail full details of date venue etc.

I will also be doing this class as a postal class, so if you want info on the postal class put in subject Plastics postal.

Or if you want both just put plastics all

Or you could join my newsletter and keep updated on my tutorials, classes and news
http://www.stampinup.net/esuite/home/stampandscraptips/blog
click contact me in the interest drop down box click request newsletter

Monday, 18 August 2014

Why I buy both the real stamp or paper and the digital stamp or paper

A customer recently asked why I buy both the real stamps and paper and the same digital stamps and paper.

Now unfortunatly I am not at home and could not do real hybrid crafting as I only have my computer available.

That is reason one.
When I only have my computer to play with  I can plan with my digital kits. Try out lots of options before finalising design without wasting a scrap of paper. Then create the  actual card with my real supplies.
Plus when the real papers are no longer available I still have them to print.

I have created a card front  and matching wrapping paper to show why having both the real supplies and the digital supplies enables you to be even more creative


So starting with the planning  I tried out loads of colourways, papers , border depths , before finalising my design. I plan to print off all the background layers . Then stamp and watercolour the top layer. The The papers I used were the Watercolor wonder papers , which I adore but are now retired , but as I have the digital ones I can still use them.  The middle paper was in the real "Watercolor wonder" DSP pack  although I decided to rescale (just because I could) but then I used another piece and altered the transparency for the back piece.  Which I think goes very well.

Now you may ask why do we need the real stamps and paper.  Well in relation to the stamps its really easy, there are loads of techniques that you can do with the real stamps that you can't do with digital stamps. Stamping and embossing . you can get special paper that you can do this with , but then you are limited to that paper, and there are techniques you can't do with that paper.
As yet I have not heard of anyone using angelina fibers with a digital stamp, or pressing it into uTEE etc. So I always have to have the real stamp. But then why have the digital.


If you have the digital stamp you have options to change the image. make it smaller , larger , thinner, fatter. So you can create your own matching backgrounds, wrapping paper , tags. I even make my own tissue tape to match the stamps.   All you need is a printer (inkjet) a peice of freezer paper, or the backing sheet from a sheet of labels , tissue paper and some different widths of old fashioned double sided tape.

1st you decide what size your tissue tape will be . You need to have doublesided tape the same width.
then you design your tissue tape. You can make tissue tape as long as your tissue paper. You will need to have more freezer paper sheets. Using doublesided tape you put them together to make a sheet as long as you need, making sure that you get tape right up to the edges. You will also need a clear space by your printer the same size.

You will have to create a custom file that length in your design softwear but, you can print lots of different tapes side by side to the width of your paper.


If any of your tape designs have words in them you will need to mirror that design.

Then you lay out your sheet of tissue on a flat surface near your computer. Print onto the shiny side of the freezer paper and then lay this on top of your tissue , hold steady with one hand while pressing all over with the other. Remove freezer paper. Turn tissue over apply doublesided tape in line with your printed tape. Trim along the edges of the tape.

So thats why I have the digital and the real stamps and papers.

Products used
Table built using Product Table Builder by The Crafty Owl - Independent Stampin' Up! Demonstrator.
So bye for now
Tracey


Thursday, 10 July 2014

Undefined Stamp Carving Kit and Elegant Butterly Punch

So today I finally sat down with my Undefined Stamp Carving kit. Which I have had for a while


Because I can't draw to save my life, I was a bit intimidated by this . However I was determined to do something with it today!!!

So I was thinking what stamp would I like, and I got to thinking in the Papillion Pot Pourrie stamp set there is a shadow stamp for the Itty Bitty Butterfly which I have used to do Kiss stamping techniques, but I have on occassion wanted a Elegant Butterfly shadow stamp. I also love making more use of what you have and kiss stamping is a great technique for getting more out of your stamp sets.  So I punched out an Elegant Butterfly stuck it to the undefined stamp block with Snail and then carved round it, so I now have a shadow stamp for the Elegant butterfly.

So to test it out I created these two cards


Both cards I used kiss stamping on. Kiss stamping is where you have one stamp and press it onto another stamp (you need one shadow style stamp to receive the pattern and one more intricate pattern stamp you can ink up both stamps or either stamp for this technique)

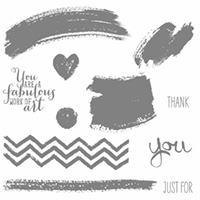
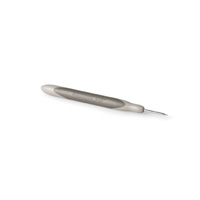
The Thank you card  I inked up my Elegant butterfly stamp with ink then kissed with Hexagons from the "Six sided sampler"  stamp set.  I lined up one edge with the centre of the body and then reversed to stamp the other side.  Then used my piercing tool to create the flight trails and antenna used the Thank You stamps from the "Work of Art" Stamp set colours Hello Honey , Tangelo Twist and, it was supposed to be Lost Lagoon but its lived up to its name I can't find it anywhere so used Island indigo instead . Finished the bodies with rhinestone strips from Basic Rhinestones.

The second card I kissed onto the clean Elegant butterfly  shadow stamp that I had carved with more of the hexagons from the same set. Lining up an edge with the center of the butterfly again and reversing again.  This time I used Blackberry bliss, Tangelo Twist and Pear Pizzaz  inkpad. I stamped the antenna using the antenna stamp from Papillon Pot Pourrie and made the flight trails with a superfine Liner pen.  The Your goodness makes me grateful stamp is from the "Something to Say" Stamp set.

So thats it folks . Everything except the superfine liner I have used for the two cards above is available to but from my shop just click on the links below. or BROWSE MY SHOP

Table built using Product Table Builder by The Crafty Owl - Independent Stampin' Up! Demonstrator.

Wednesday, 9 July 2014

Contemporary 4 by 4 Card and envelope tutorial. Featuring some products from new castalogue

I am planning to offer at least 2 tutorials a month . So here is the 1st


4 inch square Contemporary grunge card and envelope

Supplies list

Both versions

Whisper white cardstock 6 ¾ inch square and  3 3/4 inch square and 2 ½ inch square
Envelope punch board
Work of Art stamp set
Georgeous Grunge Stamp set
Feel Goods Stamp Set
Stampin’  Sponges
Snail adhesive Sticky Strip and Dimensionals adhesive pads
Basics Rhinestones
Stampin’ Trimmer
Stamp a ma Jig

Blue version                                                                                  Orange  Version
Island Indigo Ink pad                                                                       Tangelo Twist Ink pad
Marina Mist Ink pad                                                                         Calypso Coral Ink pad 
 (to purchase click on item image below tutorial)

Envelope
1 Take the 6 ¾ square of whisper white , Using the envelope punch board Punch and score at 3 3/8 inches, rotate and line up on score and punch and score, do this  on all sides.

2  Fold into the center and burnish folds with bone folder. Ink edges  with either Marina Mist or Calypso Coral

 3 Using the small ink splashes from Georgous grungestamp set.  Stamp in Island  Indigo  or Tangelo Twist On the front Stamp across each corner leaving a clear space in middle. Then stamp over back of envelope.

4 Take the heart stamp from Work of Art Stamp set  and stamp in Island Indigo or Tangelo Twist   3 on right side of card one over hanging edge. One on left near the bottom. Stamp 3 on back one over the point of flap and one higher up on each side of flap.

Place sticky strip on the inside of flap to either edge. Leave cover on until ready to use.


Card
1 Take the 8 by 4 inch piece of whisper white and score with trimmer at 4 inches. . Then ink round edges with Marina Mist or Calypso coral,  Then using the zigzag lines from Work of art. Using just about ¼ inch stamp in Tangelo Twist around all the edges of the card front.

2 Take the 3 ¾ inch piece of whisper white, and ink round edges with Marina mist or Calypso coral. Then Stamp all over with the small splatter stamp in Tangelo Twist or Island Indigo. Adhere to center of card with snail adhesive.

3 Take the 2 ½ inch piece of whisper white and round corners using the envelope punch board. Ink edges with Marina Mist  or Calypso Coral inkpads

4 Using the Stamp a ma jig/ Stamp your chosen feel goods Stamp onto imaging sheet and position   at an angle over the 2 ½ inch/square angle going up from left to right. Then using  Stamp a ma jig stamp Greeting in place. In Tangelo twist or Island Indigo

5 Take the heart stamp from the Work of Art set and using Stamp a ma jig . Position heart at a complementary angle to greeting at bottom right corner of 2 /2 inch square. Add small rhinestone to top right of heart

6 Adhere 2 ½ inch square with 4 dimentionals One in each corner to center of card.

Hope you like this tutorial

To find out about upcoming classes, Classes at home for Housebound disabled infirm and carers, Hosting a Stampin’ Up! Party, becoming a Stampin’ Up! Demonstrator  or to order


Call me Tracey Allen on 01270 215625 Stamp and Scrap (Cheshire)  or visit my shop at www.stampandscraptips.stampinup.net

Playing with A Work of Art Stamp set

Today I have been playing with the "Work Of Art" Stamp set which I love. 


These Ship cards I thought would make a great card for a Man who is going through troubled times. I thought two of the stamps in the "Work Of Art" set coud be used for waves, the arty circle for a sun and one of the brush stokes makes a great cloud. I also used the new "Traveller" stamp set for the Ship which I think is going to be my goto Mens stamp set and one I can see myself using a lot in altered art projects and The You've got courage stamp is from |the "Something to Say" stamp set and I thought it went very well with the deco feel of these cards. Colours used Island Indigo ink, Lost Lagoon cardstock and Hello Honey Ink pad and Tangelo Twist (used to blend into the greeting plaque edges)


The 3 inch square canvas I stamped with the "Work Of Art" stamp set and Blackberry bliss and Tangelo twist And Basic Black ink pads , The greeting was punched with Artisan Label punch. The lovely little flowers were punched with the Itty Bitty Accents punch pack flower punch ( which co-ordinates with "Something to Say" stamp set and Pictogram Punches Stamp set as well) I know they will both be heavily used in the near future. I coloured Medium Pearls with Blendabilities darkest Daffodil Delight, Pumpkin Pie and Rich Razzleberry pens.


I have also been playing with the shaving foam technique and decided to use some of the pieces for these little note pads using the Work Of Art Stamp set . The marbled one is obvious, but after making two pieces of marbled cardstock  I smoothed out the foam without reinking and made a sheet with that and got these horizontal patterns. Used Tangelo Twist cardstock and Lost lagoon ink on whisper white for the little itty bitty Accents punch pack flowers. Coloured rhinestoes with blendabilities

So thats what I've been up to if you want to buy any off the items mentioned you can find them at my shop
www.stampandscraptips.stampinup.net or you can ring me to order on 01270 215625

Monday, 9 June 2014

At home classes for Carers, disabled and the infirm . I'll bring classes to you

Craft classes at home for carers, disabled and the infirm  Cheshire and Staffordshire
Madge, Maree and Mildred enjoying their class
I have been doing classes for a couple of groups and realy really enjoy every minute of it. There is nothing like seeing the Joy on their faces when they create a card.  On the way home from one of these groups all I could see was these lovely ladies faces , especially the middle lady Maree she is 93 and has dementia but so enjoyed making this card so much ( even though she needed a bit of help ) and I thought "its a shame for all those who would love to do a craft class , but due to illness or infirmity or being a carer actually getting to a class is really difficult, and then I started thinking about what I could do to bring craft classes to them"


So I have decided to offer a special service

At home classes

For £30 I will come to your home within 25 miles of Crewe ( if you live a bit further away please contact me and I may be able to do it for a small extra charge for fuel) , bring everything you need to create 2 lovely projects ( designed to be acheivable with your abilities) Or £36 if your carer and you want to do it together. I will spend 2 hours with you and if you finish the projects in a flash I will also have a couple of extra things we can do together.

We will chat about crafts and anything else you want, I can guarentee you will have a great time. 

Joining Stampin' Up! was never about money to me ( not that I don;t actaully need to earn a small living) it was always to share thee enjoyment of creativity with as many people as possible, but with this servce I know that those who use it will appreciate it so much more.

If you want to book a class please phone me Tracey on 01270 215625


I love being a Stampin' Up! demonstrator even though I only joined to buy the Ink Pads, and at the moment you can join for £50 and you recieve upto £55 worth of products. I joined because I love Stampin' Up! products and wanted 20% off. I had no intention of running a business. 

Join "The Best Craft Club EVER!!!" for £50 and pick upto £55 worth of products and get 20% of your orders

Now I know a lot of you have joined the Create and Craft Club, Which is £20 with £10 back off your 1st order, and a 10% discount on orders for the next year.  

But I think of Stampin' Up! as the best craft club EVER , where you pay £50 to join  get upto £55 back (reduced joining price June 2014 only) or pay £99 and get £130 worth of products and 20% discount on your orders. I'd say it was a no brainer, plus if your friend loves what you use , you can make 20% on her orders. 

If you want to find out more or to join phone me on 01270 215625 or e mail me at stampandscrap@mail.com